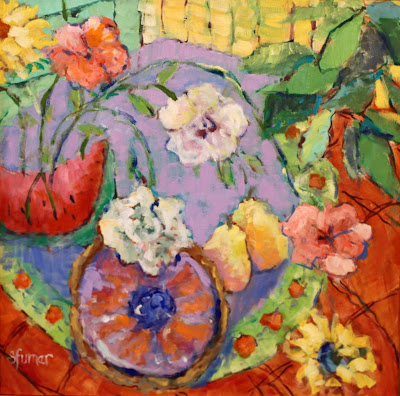
"To Imagine is Everything." or so states a Mary Englebreit card purchased so many years ago. But it is true. Every child comes with his/her own imagination as big and expansive as this big blue planet.
Living a more solitary life as a child, my IMAGINATION was my best friend. Drawing, coloring and reading transported me to places FAR from our sequestered farm. Like Heidi, I hiked the Alps and drank warm goat milk. I roamed with the Cubby in Yellowstone Park curious and intrepid. I stretched my straight hair into Pippi Longstocking like braids. And like Alice I thought I could do ten impossible things at once.
Then I grew up and up and up!
I am not a disciplined painter. What ever interests me I am willing to try. Sometimes I am successful and some times I am not. It is all a learning process. There are sessions where I paint from life, other times from photographs but mostly from IMAGINATION.
Today I would like to share two new paintings created completely through imagination...no photos, no props...just what comes out of my head and onto the canvas. The two paintings are Fresh Peach Tart (18x18 and Pitcher of Flowers (24x24).
Step 1: A preliminary rough sketch in one of my art journals is where I really just doodle around, thinking of all sorts of ideas. If an idea comes into focus I sketch with pencils and erase until it is interesting. For illustration purposes I used a color pen so that you can see the design more clearly.
Step 2: The fun part is choosing color, (greatly subject to change as you will see.) I look for contrast, warm and cool and some yummy color combinations. Watercolor and water soluble crayons work perfectly for this stage. This is the only time I use a water based paint unless I am going to do the ENTIRE painting in acrylic.
Step 3: Transfer design to the canvas or board support. I usually transfer by sight. But you can draw a grid or use a projector to make it easier. Your original sketch has to be in proportion to the canvas size. Willow charcoal or pencil is used to lay on the first design lines. This is very faint.
Step 4: Mixing a thin dark color such as reddish blue or ocher and using a small round brush I lightly sketch OVER the charcoal or pencil lines, adjusting as I go. At this point I switch to oil that is lightly diluted with mineral spirits or a drying agent. The new lines are deliberately sketchy, curvy, thick and thin. Set the canvas aside for the paint lines to slightly dry. This is a good time to place desired paint colors on palette. My studio palette is a large plate of glass; for travel a piece of laminate does nicely ( If you are going to paint only in acrylic, the sketching is done with acrylic thinned with water and a pointed round brush.)
Step 5: Using slightly thinned paint I place my colors loosely following my original sketch. This is when I can tell if my colors are going to work or need adjusting. The painting at this point is very flat without perspective or texture. A bit like a coloring book. I paint over the lines here and there.
Step 6: With basic colors in place, now comes the time for serious decision making on placement, colors, design and contrast. I lightly redraw my lines where corrections need to be made with more thinned paint and a small brush. The design is now pretty well set for the refinement stage.
Step 7: Refining and defining are the FUN part. It consists of heavier paint which is applied with large filbert brushes. Yes LARGE, no wimpy brushes! You may paint over the lines or up to the lines. I like a very loose feel and paint over many of the lines. You can repeat the steps of redrawing and repainting until you are satisfied. If you don't like something, simply scrape it off CAREFULLY with a palette knife.
Step 8: Typically I prefer to paint on more than one canvas at a time. Just as one idea leads to another, what I do on one painting might work for the other. I set my work aside for a few days or weeks. Some painters can do a painting in a day or so. For me there needs to be a fallow period of time, just leaving the work ALONE.
Step 9: Later when I come back to the painting it is much more clear to see what might need adjustment such as color, paint strokes, texture and over drawing. For me it is invaluable to come back to a painting.
Step 10: When you are complete sign your name and take your photos!
Voila, they are complete. These paintings were done in oil. After they are very dry to the touch I spray lightly with RETOUCH varnish. Otherwise it takes about one year to use regular varnish for oil paintings. If you paint entirely in acrylic you may varnish with a water base varnish once dry.
I hope you enjoyed seeing how I do Imagination Paintings. Of course, I love many styles and they have their own approach.
If you have any questions, feel free to write to me.


No comments:
Post a Comment
Thank you for visiting my blog today. I appreciate the time you take to say hello. Warmly, Sharon